> For the complete documentation index, see [llms.txt](https://docs.getpurpledot.com/docs/llms.txt). Markdown versions of documentation pages are available by appending `.md` to page URLs; this page is available as [Markdown](https://docs.getpurpledot.com/docs/shopify-stores/pre-order-tracking/meta-integration.md).
# Meta integration
{% hint style="info" %}
This guide applies only when selling pre-orders through Purple Dot's own checkout. Pre-orders sold through the Shopify checkout benefit from the same tracking as your regular sales.
{% endhint %}
If you have enabled Meta tracking on the Integration settings page in the [Merchant Portal](https://www.purpledotprice.com/merchant-portal/integration), the Purple Dot checkout automatically sends certain events to Meta via the [Conversions API (CAPI)](https://developers.facebook.com/documentation/ads-commerce/conversions-api).
#### **What you need before you start**
* The **Facebook & Instagram** app installed on the Shopify store and connected to the merchant’s Meta Business account
* A **dataset (pixel)** active on the storefront via that app, with browser events flowing in Events Manager
* Admin access to the merchant’s **Meta Business Manager** and **Events Manager**
#### **Prerequisites**
Before configuring Conversions API in Meta or connecting Purple Dot to your Meta account, you must have the **Meta Pixel running on their Shopify storefront**. Purple Dot will not send any server-side events for a session where we could not find browser cookies (`_fbp` and `_fbc`) that the pixel sets in your storefront.
#### **Step 1 - Install the Facebook & Instagram app on Shopify**
1. In **Shopify Admin**, go to **Settings → Customer events** (or open the [Shopify App Store](https://apps.shopify.com/facebook)).
2. Search for and install **Facebook & Instagram** (by Meta).
3. Open the app and sign in with the Meta account that has access to the merchant’s **Business Manager**.
4. Connect the Shopify store to the correct **Meta Business Portfolio** (Business Manager).
5. When prompted, connect or create a **dataset** (Meta Pixel). Use the same dataset you plan to use for Conversions API and Purple Dot.
6. Complete the app setup and confirm the pixel is **connected** and **active** on the storefront.
*Facebook & Instagram app connected to Meta account*
> ***Use the same dataset everywhere.** The Dataset ID you enter in Purple Dot must match the dataset connected in the Facebook & Instagram app and shown in Meta Events Manager. If these don’t match, connection tests may pass but production events will go to the wrong dataset or checkout events won’t attribute correctly.*
**Verify the pixel is working on the storefront**
1. In **Shopify Admin**, go to **Settings → Customer events**
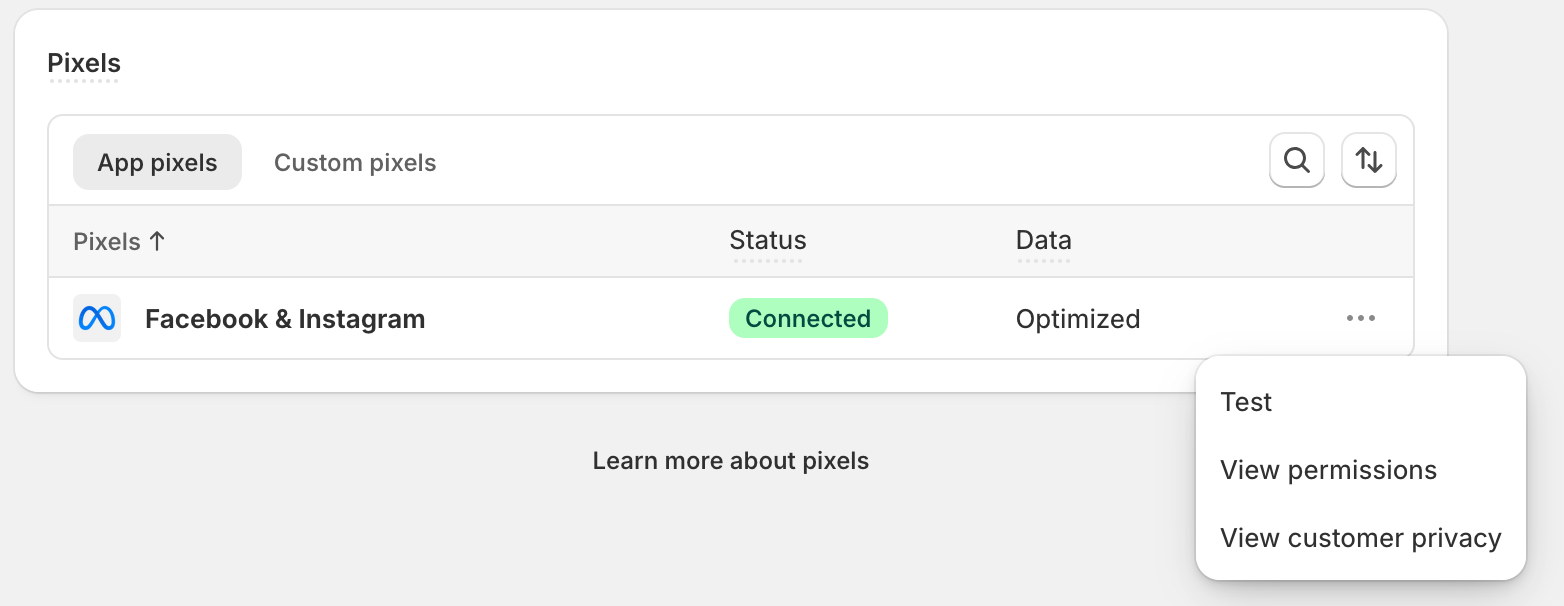
2. Verify the app is “Connected”
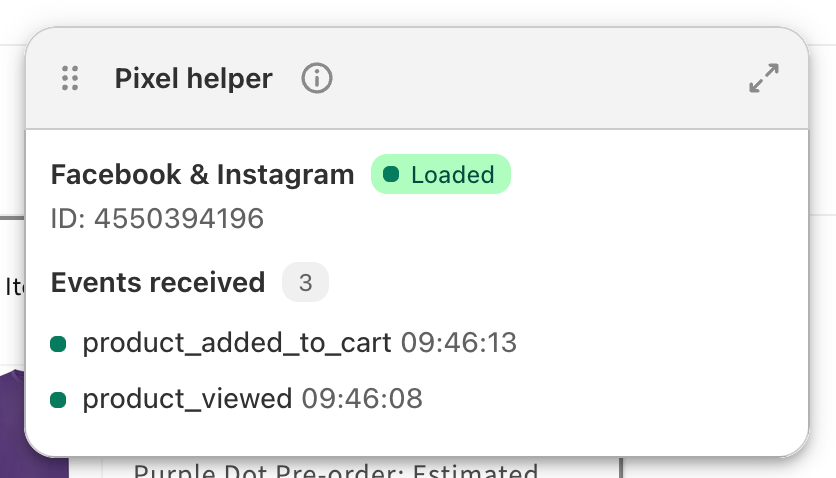
3. On the **Facebook & Instagram** app, click “Test”
1. Accept any **cookie consent** banner that covers marketing/analytics cookies
2. Confirm events are being processed
#### **Step 2 - Set up the Conversions API connection in Meta**
1. Open [Meta Events Manager](https://business.facebook.com/events_manager).
2. Select the **dataset** used on the merchant’s storefront (the same one connected via the Facebook & Instagram app).
3. Go to **Settings** (gear icon) → **Conversions API**.
4. Choose **Set up manually** or **Connect via partner** (either works; Purple Dot sends events directly with an access token).
5. Review the event configuration. Purple Dot sends these **standard Meta events**:
| **Purple Dot action** | **Meta event name** |
| ----------------------- | ------------------- |
| Item added to cart | `AddToCart` |
| Checkout started | `InitiateCheckout` |
| Payment details entered | `AddPaymentInfo` |
| Pre-order completed | `Purchase` |
6. Confirm the dataset is configured to accept server events for those event types.
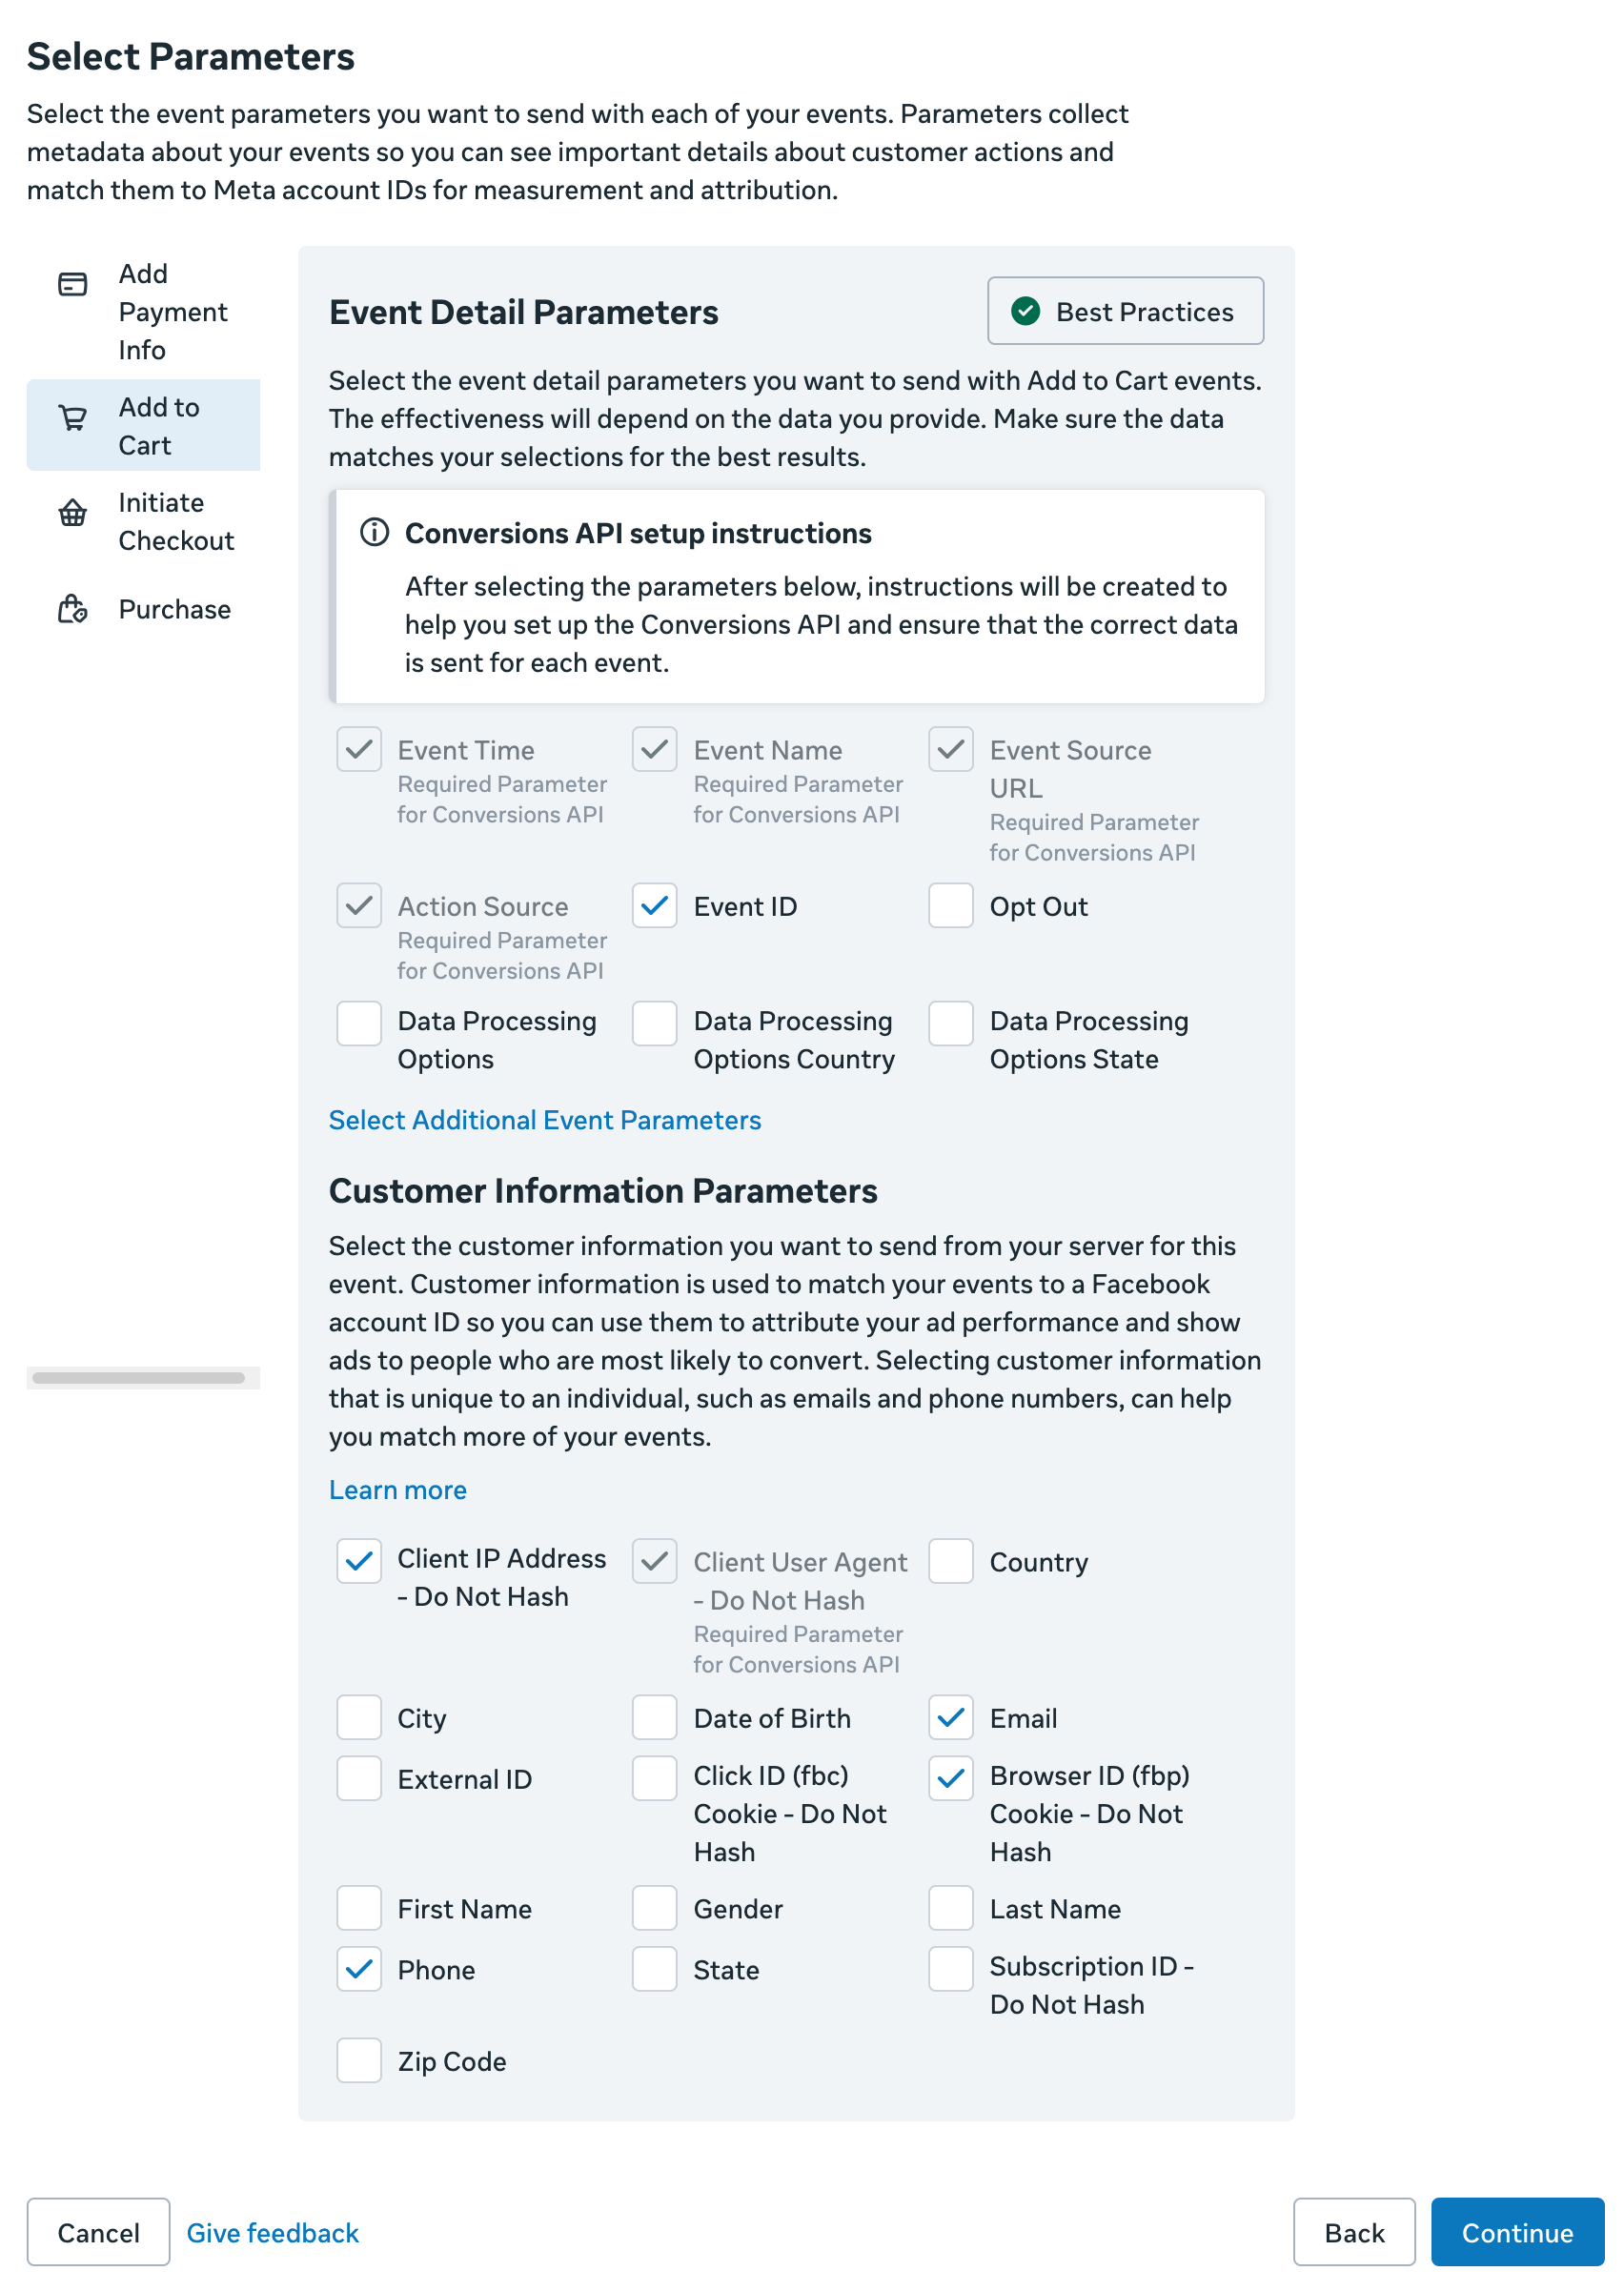
7. Configure the parameters to send with the events
1. Event ID
2. Email
3. Browser ID
4. Phone
5. Client IP
#### **Step 3 - Generate an access token, get the Dataset ID, and open Test Events**
**Generate an access token**
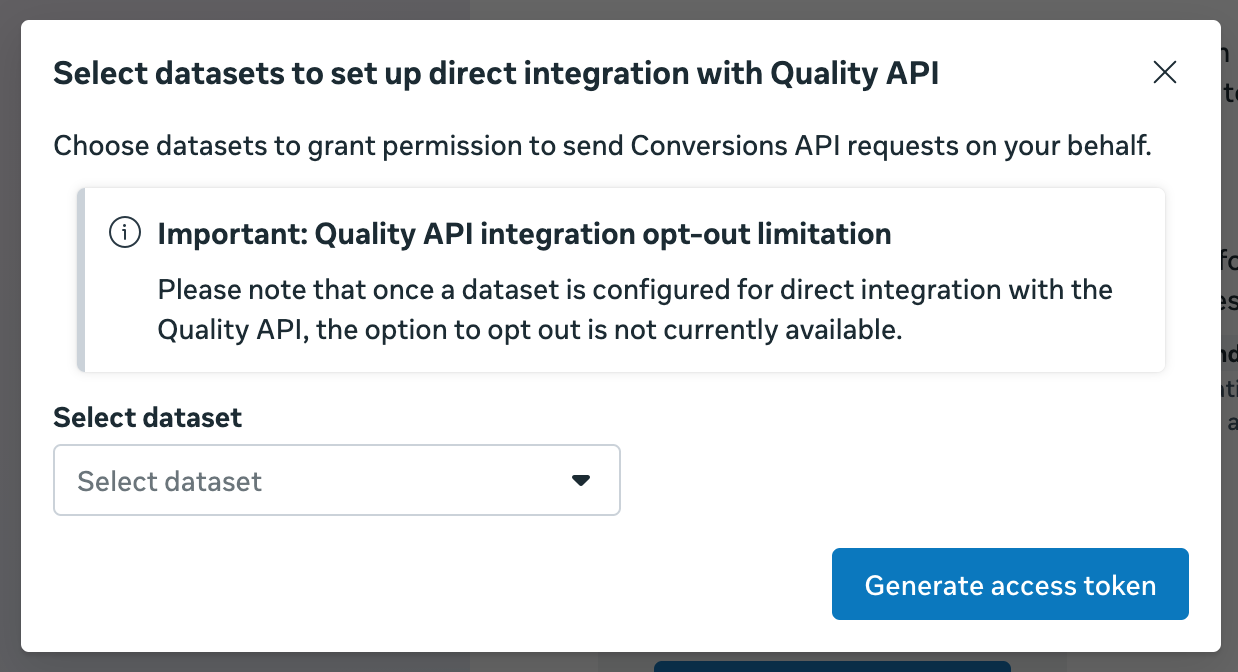
1. In Events Manager, on the same dataset, go to **Settings → Conversions API**.
2. Under **Set up manually**, find **Generate access token** (or **Set up with Conversions API** → token section).
3. Click **Generate access token**.
4. Copy the token immediately and store it securely. Meta may not show it again.
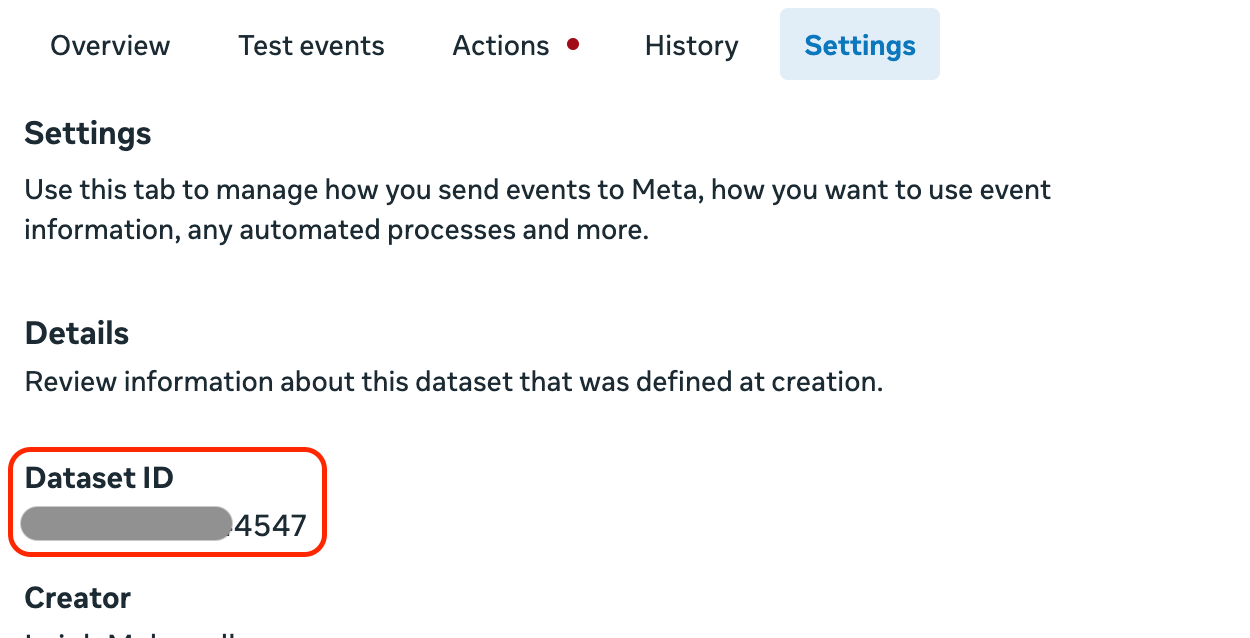
**Find the Dataset ID**
1. Stay on the dataset in Events Manager.
2. Open **Settings**.
3. Copy the **Dataset ID** (numeric string, e.g. `1695925551723490`).
Use this value in Purple Dot’s **Dataset ID** field (not the Business Manager ID or ad account ID).
**Open Test Events (for verification)**
1. In Events Manager, select the dataset.
2. Open the **Test Events** tab.
3. Copy the **Test event code** shown at the top (e.g. `TEST52433`). You’ll use this when testing from Purple Dot so events appear in this tab instead of production reporting.
Keep this tab open while you run the connection test in Step 5.
#### **Step 4 - Add credentials in Purple Dot**
1. Log in to the **Purple Dot merchant portal**.
2. Go to **Settings → Integrations**.
3. Under **Analytics**, click **Connect** for **Meta**.
4. In the Meta connection modal, enter:
| **Field** | **Value** |
| ---------------- | ---------------------- |
| **Access Token** | Token from Step 3 |
| **Dataset ID** | Dataset ID from Step 3 |
5. Click **Save**.
#### **Step 5 - Send a test event and verify the connection**
You can verify in two ways. Use **Test Connection** in the modal for the first setup; use the **Test** button on the saved connection tile for later checks.
**Option A - Test before saving (recommended for first setup)**
1. In the Meta connection modal, fill in **Access Token**, **Dataset ID**, and **Test Event Code**.
2. Click **Test Connection** (bottom-left of the modal).
3. Wait for **“Credentials verified!”**
**Confirm in Meta Events Manager**
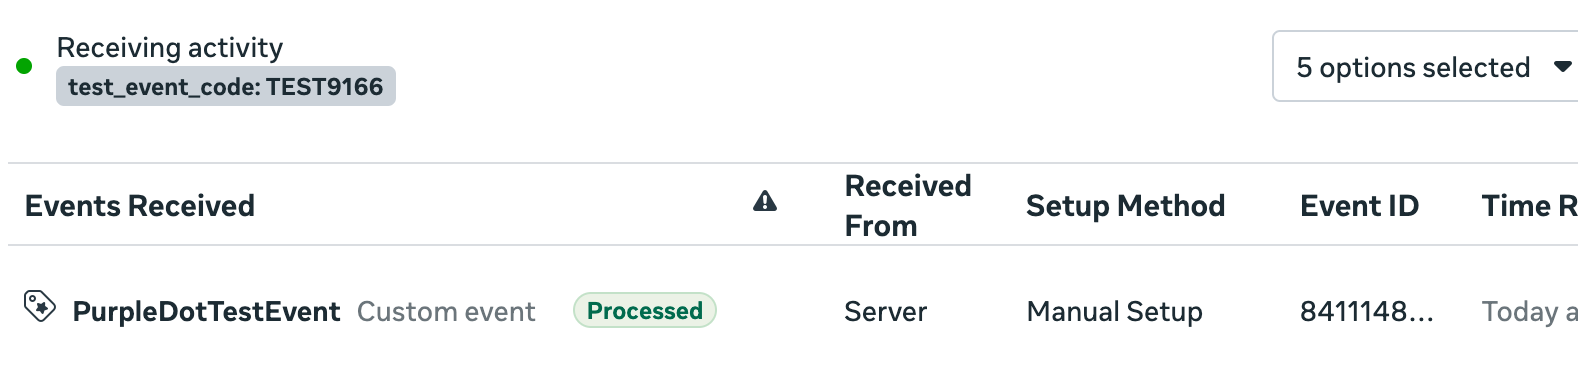
1. Return to **Events Manager → \[your dataset] → Test Events**.
2. Within a few seconds, you should see an event named `PurpleDotTestEvent`.
3. Confirm the event shows as received/processed (not rejected).
**Option B - Test via live checkout with `meta_test_event_code` (end-to-end)**
This option verifies the full integration: storefront → Purple Dot checkout → Meta CAPI → Events Manager Test Events. It is the best way to confirm real checkout events (`AddToCart`, `InitiateCheckout`, `AddPaymentInfo`, `Purchase`) are flowing correctly.
1. Copy the **Test event code** from **Meta Events Manager → \[your dataset] → Test Events**.
2. Open the storefront with the test event code in the URL:
`https://your-store.com/products/example-product?meta_test_event_code=TEST52433`
Replace `TEST52433` with your actual test event code. The parameter can be added to any storefront page URL.
3. Complete a test pre-order/checkout flow (add to cart, open checkout, enter payment details, complete the order).
4. In **Meta Events Manager → Test Events**, confirm the real checkout events appear - for example `InitiateCheckout`, `AddPaymentInfo`, and `Purchase`.